Save Time: Get 5 Simple Writing Tips
you can put to use in 10 minutes
3 Things You Need for Planning a Website (or Updating One)
Award-winning writer Kathy Widenhouse has helped hundreds of nonprofits and writers produce successful content , with 750K+ views for her writing tutorials. She is the author of 9 books. See more of Kathy’s content here.
Updated 5.14.25
Reader D.H. sent me question.
“I’ve been planning a website for my communications/PR freelance biz. My research shows I could build a website on my own (not something that appeals to me) or have someone do it for me (my preference). Could you give your readers nuts-and-bolts information about getting a website up and running, including choosing a domain name and hosting company, for $300- $1,000?”
Glad you asked.
Planning a website can be overwhelming, especially if you’ve never done it or if you’ve got a zillion other things to do to run your business. I’ve planned and built websites more than a few times – my own sites as well as sites for clients.
My learning curve was steep. But I’m all about making writing simple. Which is why I’m convinced you don’t need to lose your mind or your pocketbook in the process of building a website.
As D.H. alluded, there are different options you can choose. You can pay a website designer, you can DIY your site, or you can choose a hybrid approach. I’ll get to those in a minute.
But note … even if you hire a designer, it’s wise to understand the process so you know you’re getting what you pay for.
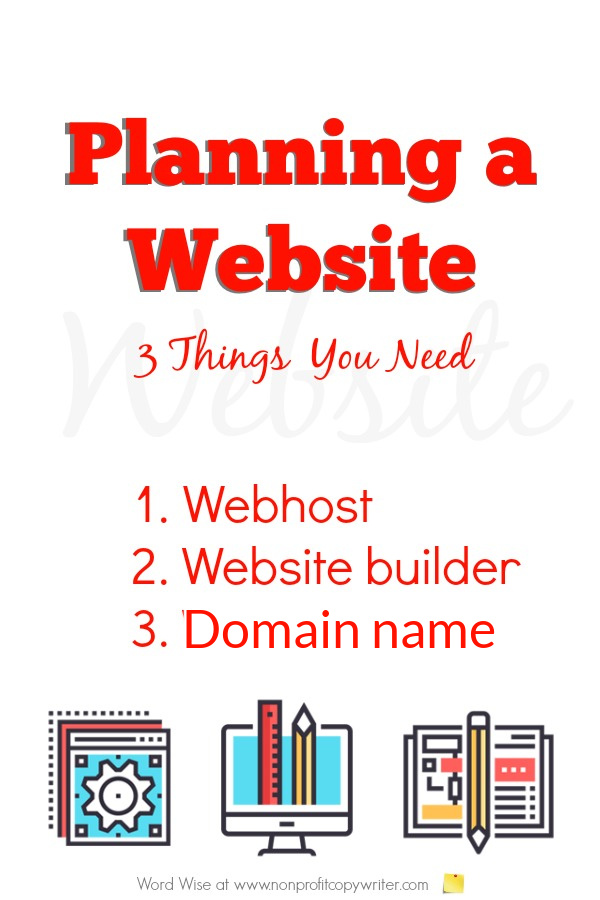
Here are the three practicalities you need to know about to start planning a website. Get those in place first – you’ll get online so the search engines can begin to find you. I’ve included steps beyond those first three so you can continue to build and update your website content page by page.
Planning a website: 3 steps to take first
You can take these steps in any order. However, I suggest you choose your domain first.
This way when you’re ready to register with a web host and a content management system, you already know what your site will be called. Plus, you will have done the hard work of determining that your blog’s focus to a slant in in your niche. You will understand who your competitors will be and how you can be different from them.
And because you’ve done your homework, you understand that website traffic is not built in a day. It takes time to grow a following.
Step 1. Choose a domain name
Your domain represents your blog’s identity online, so make sure it’s something easy to remember and spell. And choose a domain that fits your niche.
Try these tips.
- Make your domain simple and relevant. Let me share a bit of
personal experience here. You’re reading this as part of my www.nonprofitcopywriter.com site.
My domain reflects my brand – what the website is about. It gives visitors an
idea of what to expect: helpful information about writing for nonprofits. Clearly,
my domain is relevant to my niche.
But simple? Honestly, not so much. My domain is a mouthful. Nevertheless, for now I’m sticking with it. But if you’re just starting out, try to choose a shorter domain than mine. - Use one or more keywords in your domain. I score big here. I’ve
got 3 keywords in my domain: “nonprofit,” “copywriter,” and “writer.” Try to
include at least one of your main keywords in your domain.
- Get a .com domain if you can — that’s the most
trusted and recognizable domain suffix. Avoid hyphens and numbers. They can be
confusing when spoken aloud and are often mistyped.
- If you’re struggling, ask ChatGPT or another AI tool to help
you choose a domain name. Share a bit about yourself, your website’s focus, and
ask for a slate of domain ideas. If don’t like what the chatbot suggests, you
can always ask for more options.
- Check to see if your domain idea has already been purchased.
To do that, hop over to GoDaddy.com or another domain registrar to check and
see if yours is available. If it’s taken, consider variations or different
extensions (.com, .net, .co).
While you’re at it, check the social media sites you plan to use for your biz. If Facebook and Instagram already have pages named after your business, you’ll drive your traffic to someone else’s page. But if you can build your social media pages using your domain name, you can strengthen your brand identity and be consistent. - Once you find the right domain name, register it promptly before someone else does … but not until you choose a web host. Many web hosts take care of that step for you. Let them do so, and you can save a few bucks.
Step 2. Choose a web host
A web host is a company that “rents” online space to you online and provides the technology you need so your site has a place to “live” on the web. The host connects your content to your reader.
Think of your web host as your own personal cubby on the World Wide Web.
Hosting fees can be inexpensive – just a few dollars a month. There are plenty of low-cost webhost providers out there. Choose one with a reputation for good service and you’ll save an untold amount of aggravation. (Check out Wix pricing, WordPress web hosting costs, and fees for Blue Host.)
Your web host often throws in the cost of registering your domain, connecting it to its servers, providing your SSL certificate Secure Sockets Layer (which authenticates your site as trustworthy), and CDN (Content Delivery network, including cache services) for the first year.
But a word of caution. Check your host’s reputation for site speed, uptime, and overall performance. Compare with others. You want your site to load fast or readers will get frustrated and click away.
Step 3. Choose a CMS (content management system)
A website builder (also called a website platform, content management system, or CMS) is a tool that lets normal people like you and me build a website without manual coding.
You create pages (files) in your website builder, click “Save,” and Poof! Your webhost makes them live.
If you’re a do-it-yourselfer, you want as simple a CMS as possible. WordPress is a well-known website platform for small businesses and bloggers alike and is compatible with Blue Host and most webhosts. Wix and Weebly offer free plans with basic features and templates. These are user-friendly and don't require coding skills.
Because I love to simplify, my favorite website builder for small business is Solo Build It (SBI) – read a review here. SBI includes hosting, technicals, content management, keyword research, social media integration, blogging, and newsletter opt-ins all in one – for not much cost (about $1 a day).
You’ll have a learning curve with any website builder. But don’t panic. Word Press, SBI, and most platforms offer detailed, step-by-step user guides.
One of the most important steps they’ll help you take is choosing and setting up a website template – a pre-formatted page for your site that designates layout, headers, colors, and fonts. The template provides a framework in which to build your site’s pages. You’ll use the template as a starting point for each page you add to the site. There are thousands of templates to choose from. You want yours to do 3 things.
- Load quickly
- Look great
- Be free from technical issues
Planning a website: should you outsource or DIY?
Outsourced website building
You can outsource the project to a professional web designer. Go to a freelancing job board like Fiverr Pro, Upwork, or Freelancer.com and hire a website developer to give you the basics (cost: $250-$1,500, depending upon how many pages, bells, and whistles you want.)
Be sure to specify the tasks you’re bidding on.
- Do you want the designer to simply set up your site so it’s connected to your host?
- Do you want the developer to load the template … or design a template?
- What about extras like social media links, SSL encryption?
Be sure your agreement specifies deliverables.
DIY website construction
If you’re a small to mid-sized business, you may not have the budget to hire a developer or you may need to work that in to your financial allocations. There are plenty of tools you can use to build a quality website.
I love the DIY route, especially for solopreneurs, small businesses, and ministries. I built my own website using SBI.
And Christina Hills offers a terrific Website Creation Workshop with support, which allows you to build your own site and update it forever (about $1500).
Hybrid website construction
You can choose a hybrid approach. Outsource parts of the project, like the WordPress setup and design. Then, get enough skills thorough Christina’s course to learn to write content, create images, optimize each page, and load the content yourself.
For a basic site, costs are about the same for outsourcing and DIY (in the long run).
- Outsourcing gets you online fast.
- DIY allows you to add content and updates on your own.
If your site is to be static and you don’t plan to add or update content but once a year, then outsourcing may be your best bet. If you want to take an active role in building your website or blog steadily over time, then DIY or hybrid is the more cost-effective approach.
The 3 next steps to take in planning a website
Once you’ve completed Steps 1-3, you are no longer planning a website. You’ve got one. This is when the fun begins!
There are three sets of next steps to take with planning your website: technical customizing, traffic, and content creation. I’m a writer and find the content creation side more interesting so I’ll leave until last to get two other necessary evils out of the way.
1. Make a plan to customize your site’s technicals
You don’t need to address necessary technicals on your site on the first day. Simply make a plan on your calendar to do so -- soon. If you’re squeamish about technology, you can outsource some of the more advanced website and blog features like:
- Categories and tags (for blogs)
- Logo and favicon
- Site speed and loading
- Plug ins
- Shopping cart
- Chat box
- Permalinks
- SSL certificate for security
- CDN (Content Delivery network, including cache services)
- Mobile optimization
2. Make a plan to build traffic
“Build it and they will come.” It’s a feel-good sentiment from the 1989 feature film Field of Dreams, but a useless approach when it comes to getting visitors to your site.
Instead, be purposeful. Make a plan to get eyeballs on your content.
Build traffic with keywords
- Invest a bit of time learning the fundamentals of SEO. You’ll be glad you did. LeAnn Fox has a simple (and free) step-by-step SEO course that explains the basics.
- Then, use tools like Google’s Keyword Planner, Ubersuggest, and Keywords Everywhere to find out what terms related to your niche are most-searched online. (These terms are called your “keywords.”) Create a personalized list of these keywords. Choose and use a unique keyword on each page of your site. You’ll improve your site’s visibility and make your website attractive to the search engines … which I turn leads to more viewers.
Build links
By far, the most common way people show up on your site is through a link. Make a plan to include 3 types of links on your site.
- Inbound links: Links from another website to yours, which validate your site as a useful and reliable source of information.
- Internal links: Links from one page on your website to another page on your website (like this internal link), which guides readers through your content and keeps them on your site longer … thereby increasing your authority score.
- Outbound links: Links that point to other websites. Referencing credible sources signals that you understand the niche and its players.
3. Make a plan to create content
Web content includes written content, graphics, and video for your site pages. It’s the stuff you share with your readers. (Here's a way to get started deciding what content to include on your website.) Plus, you can use the SEO keywords you uncovered to optimize each new page of content. You need two kinds of content for a successful website or blog.
Written content
Experts agree that you should start with 3 key pages first: Home, About, and Contact.
Beyond those, you need a content writing plan. A successful one starts with building anchor pages, followed by second and third level pages. In other words, build an “outline” to follow as you create content.
Create your outline by identifying your site’s primary, secondary, and tertiary keywords.
Your list of keywords gives you a ready-made plan for creating content systematically. For instance, let’s say your website is about pickleball for youth and young adults.
- Primary keywords: Depending on your keyword research, your primary keywords might be pickleball, pickleball for youth, and pickleball for young adults. You will want to include those keywords as often as possible throughout your site.
- Secondary keywords: Your secondary keywords could be pickleball gear, pickleball rules, pickleball strategy, and pickleball training. These can become your navigation links and pillar pages.
- Tertiary keywords for pickleball training might be strengthening exercises for the 20s pickleballer, stretching exercises for the teen pickleball player, young adult conditioning for pickleball …
Visual content
Each page of written content needs graphics, images, or video. You can use stock photos for free from sites like Unsplash.
But better, create your own. Make a plan to set aside time to learn the basics for using free versions of Canva or PicMonkey. You can also create simple videos from your iPhone to post on your site.
Planning a website starts with just 3 steps
Over time, you may decide to update your template or even change web hosts.
But for now, planning a website begins by following the first 3 steps. Then you can camp out in the back end of your site. You can write and add content pages to the site as slowly or as quickly as you like, using the second set of steps.
Your website won’t burst on the internet scene overnight. A following takes time to cultivate.
But if you make a plan and work your plan, you can build a professional-looking website without breaking the bank.
More Website Writing Tips
12 Tips for Writing Website Content That’s Easy to Read ...
What are Your Content Pillars?
How To Create a Lead Magnet: A Simple Writing Formula ...
The 3 Types of Links Your Website Needs and How to Build Them ...
Pillar Pages: what they are and why you need to write them ...
Should You Build a Niche Website? Take This Quiz to Find Out ...
3 Simple Tips for Writing Better Web Pages ...
How to Build a Content Writing Strategy for Your Blog or Website ...
The 6 Pages You MUST Have on Your Writing Website ...
Make a P-L-A-N for Your Website Content Writing ...
4 Writing Tips for Starting a Blog or Website ...
Writing Content For a Website: Write These 3 Pages First ...
Top 10 Website Writing Tips ...
Review: Website Hosting with SBI (Solo Build It) ...
3 Tips for Writing Homepage Content: A Quick Tutorial ...
10 Writing Tips for Your Website About Page ...
How to Write More Powerful Lead Magnets: 5 Easy Steps ...
Terms You Need to Know for Writing Website Content: A Glossary ...
Website Tip: How to Get Your Website Noticed (a primer) ...
Website checklist: 10 items you need on your website template ...
More Website Writing Tips on our Pinterest board ...
Return from Planning a Website to Nonprofit Copywriter home
As an Amazon Associate I earn from qualifying purchases.
Share This Page

Named to 2022 Writer's Digest list
BEST GENRE/NICHE WRITING WEBSITE


Stop Wasting Time!
Grab your exclusive FREE guide, "5 Simple Writing Tips You Can Put to Use in 10 Minutes or Less"
