Save Time: Get 5 Simple Writing Tips
you can put to use in 10 minutes
Use a Blog Post Worksheet to Save Time and Frustration
Award-winning writer Kathy Widenhouse has helped hundreds of nonprofits and writers produce successful content , with 750K+ views for her writing tutorials. She is the author of 9 books. See more of Kathy’s content here.
Updated 4.28.26
I wish I had a blog post worksheet when I first started my blog and website.
Back then, I had no writing plan and no blog writing steps. Instead, I had a lot of frustration. I published a 300-400 word post just once a month. That averages out to writing 10 words a day.
And getting that done? It was a stretch. I was working full-time outside the home. My husband and I were busy raising two young children and I had to learn to write in spurts in between baby bottles and toddler tantrums.
I found that if I didn’t have clarity about what to do in those snippets of time, I spun my wheels. I wanted desperately to get words on paper, but when I put my hands on the keyboard, the prospect seemed overwhelming.
No wonder would-be bloggers publish only intermittently … or worse, give up.

Download your own copy of the blog post worksheet and save time on your next post.
Organize ideas on your blog post worksheet
Since then, I’ve learned a simple truth: writing a blog post is merely a series of steps.
What made the difference for me? Having a blog writing worksheet to follow as I write each post. I set up the worksheet following the basic blog writing template: headline, first paragraph, post body, and conclusion. The worksheet is a visual tool that divides the blog writing process into segments. it organizes my writing steps.
When you have a “fill in the blanks” worksheet, you can see what ideas you’ve got … where you need to gather more information … where you need to wrestle for clarity.
I use it – then and now – to jot down notes. Scribble. Erase or delete and try again.
Create a personalized writing plan with your blog post worksheet
As you scrawl notes, you place them on different parts of your worksheet. That means you automatically create an outline. And you have a ready-made writing plan for your post.
Your worksheet divvies up the post into a series of segments that you’ll need to write out more completely. Then, when you have a few minutes to write, you can choose a segment to work on.
For instance, let’s say 15 minutes materializes before a Zoom call. Or your preschooler naps a little longer than usual. You can use that time efficiently. Just glance at your worksheet, choose one of your blog writing segments, look at your notes, and hit the keyboard.
And with a worksheet organizing your ideas (no matter how raw), you don’t need to carry all those thoughts in your head. You’ve got them on your worksheet, even if they’re rough.
That means you don’t need to write your blog by starting at the beginning, working on the middle, and finishing up. You can complete your blog writing steps in any order. If you’ve got a terrific idea for your post conclusion and your call to action, you can tackle those before hammering out the post body. Your blog writing plan flexes with you.
Create blog writing steps on your worksheet
A blog writing worksheet gives you a visual outline to follow as you write the different segments of your blog post. Then, you write them one at a time. Here’s what I mean.
1. Write the blog post headline
Your blog post headline is the first bit of content that the reader sees. But it’s often the last bit I write.
I use my first paragraph, main body, and conclusion to distill my message. Then, I fashion a headline that includes the posts keywords and offers a benefit to my reader. Or I get ideas while I’m writing the post and jot them onto this section of the worksheet.
Give yourself plenty of room on your worksheet to write a bunch of headlines – ones that will be useful to the reader, create a sense of urgency, offer some surprise or uniqueness, or be specific to her problem. Then when you’re finished writing and editing your blog post, choose the best one.
2. Write the post’s first paragraph
Your first paragraph should include your post’s main idea, (thesis), a hook, and a transition to the body of the post.
Even if you have your post’s main idea in your head, write it down. When you put the main idea on paper you get clarity, whether it’s a premise, problem, or promise.
- A premise states a truth your reader needs to know.
- A problem is a challenge your reader faces.
- A promise is an assurance for your reader.
You can state the main idea outright in the first sentence. Or you can open up with a hook – a quick story, interesting fact, catchy quote, or a startling statistic – and then move to your premise or problem or promise. The key to success in your opening paragraph is to get to your point right away. Don’t take a whole page to do it.
Your first paragraph should also include a note about how you will transition to your post’s main body. Explain that you’ll answer the question or solve the problem with a …
- List: you’ll present content items without sequence.
- Cause/Effect: you’ll present the outcome (effect) of the premise (cause).
- Sequence: you’ll present a series of points in a logical order.
- Simple to Complex: you’ll explain a complex answer or solution by adding one point at a time.
- Whole-to-Parts: you’ll present big picture first and then its subsequent parts.
- Comparison: you’ll organize solutions or answers that are alike and how they are different.
3. Write the main body
The typical blog post body is made up of at least three sections. Each section provides a point that helps to support the main idea of the post.
Of course, you can write two sections or even ten sections, if you prefer – depending on your topic.
And each section can be as long (several paragraphs) or as short (one paragraph) as you like.
Your worksheet can help you organize it all. (Here's the worksheet I use.) Use your worksheet to jot down ideas for each section, including:
- Its main point
- A subhead that reinforces the point
- Support for the point – an anecdote, statistic, fact, explanation, quote
If you’re writing a list post, complete one section for each item in the post. That would mean five sections for a post titled, “5 Tips for Writing Listicles That Stick.”
4. Write the conclusion
Jot down ideas for a snappy (rather than tedious) conclusion.
- You can tie back to your opening story or statistic and cite how the post information solved the problem or kept the promise or explained the premise.
- You can add, amplify, or expand on the promise you made in the opening and add a twist … a quote … a turn of events … a new insight that underscores your main point.
- You keep a surprise in your back pocket to pull out at the end as a way of saying, “I saved this for last!”
Finally, tell your reader what to do. Give a call to action to engage the reader, build a relationship, and get the reader to respond. A call to action tells the reader what to do next. For example, you can tell the reader to …
- Share the post
- Respond in comments
- Click a link – maybe to a different post on your site or to an offer
- Apply the content to a specific situation
- Ask for more information
- Seek help or support – and where or how to do that
Create more posts with less confusion
A blog post worksheet is a tool to get you unstuck. But it’s more than just an answer to writer’s block. It gives you a system.
- A blog post worksheet gives you a structured way to flesh out your blog post ideas.
- A blog post worksheet gives you a structured way to create steps to write a blog post in manageable chunks.
Once you have your worksheet in place, you can write a new post one chunk at a time.
- If you’re a linear thinker, then work on posts one by one.
- If you work best with lots of moving parts circling around, then you can have several blog post worksheets in progress at the same time.
Use a worksheet and you’ll save time and be more efficient. But best of all, when you use a worksheet you’ll clear out confusion in your thinking. You’ll have clarity on the page. That means you’ll get more posts written … and into the hands of your readers.
I use a blog post worksheet. Check it out here.
More Blog Writing Tips
What Is a Blog … and How Does It Work?
How to Start a Blog and Make Money: a Beginner's Guide ...
How to Brainstorm Blog Post Ideas for Your Blog or Content ...
If You Want To Guest Post, Think Like A Site Owner ...
Download Your Blog Post Worksheet.....
4 Different Types of Bloggers That Succeed: Which Are You?
Avoid the Biggest Guest Blog Post Boo-Boos ...
The Most Successful Blogs Avoid These 13 Mistakes ...
How To Write An Opening Paragraph for Your Blog Post ...
New Blog Post? 6 Traffic-Building Strategies to Use Right Away ...
Top blog writing tip: The One Point Rule ...
How to Create a Content Calendar ...
5 Writing Tips for Bloggers in a Time Crunch ...
Blog Writing Template: How One Blogger Writes 5 Quality Posts a Week ...
Blog Post Length: How Long Should My Blog Post Be?
More Blog Writing Tips on our Pinterest board ...
The 20-Minute Blogger (eBook or paperback) ...
The 20-Minute Blogger: Take a Writing Course That Saves Time ...
Return from Use a Blog Post Worksheet to Nonprofit Copywriter home
As an Amazon Associate I earn from qualifying purchases.
Share This Page
Named to 2022 Writer's Digest list
BEST GENRE/NICHE WRITING WEBSITE

Stop Wasting Time!
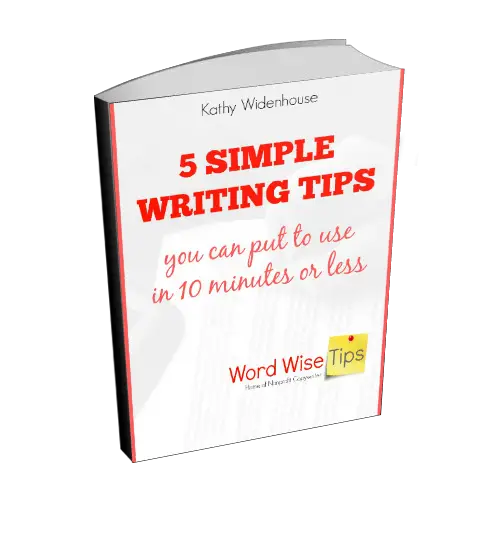
Grab your exclusive FREE guide, "5 Simple Writing Tips You Can Put to Use in 10 Minutes or Less"
 Subscribe To This Site